

It’s finally here. You’ve held out as long as you can; rebelled against the status quo; resisted the winds of change. But alas, you didn’t stop the coming change dead in its tracks, you merely slowed it down as best you could.
But now the rising tide is upon your head. The time has come. Windows 10 End-Of-Life (EOL) is here, and if you want to receive security updates and all other manners of support from Microsoft, you’re going to have to migrate/update to Windows 11. Now, Windows 11 has been around for years, so for some of you, this shtick is either very old news for you because you’ve already updated your system, or because now, you may not “have a choice” in the matter.
Whatever the case, we’re here to at least give you a gentle reminder an refresher course on how you can update your PC to Windows 11. And we start with…
Checking Your System’s Compatibility

For the uninitiated, and the ones that have held out from porting over since Windows 11’s arrival in 2021, you’re going to need to check your system’s compatibility. Basically, your PC needs to support Trusted Platform Module 2.0, or TPM 2.0 for short.
You’ll also need to enable Secure Boot in your system’s BIOS. There’s also a laundry list of processors that Microsoft insists that will support Windows 11, although there’s actually a way to circumvent that. More on that later.
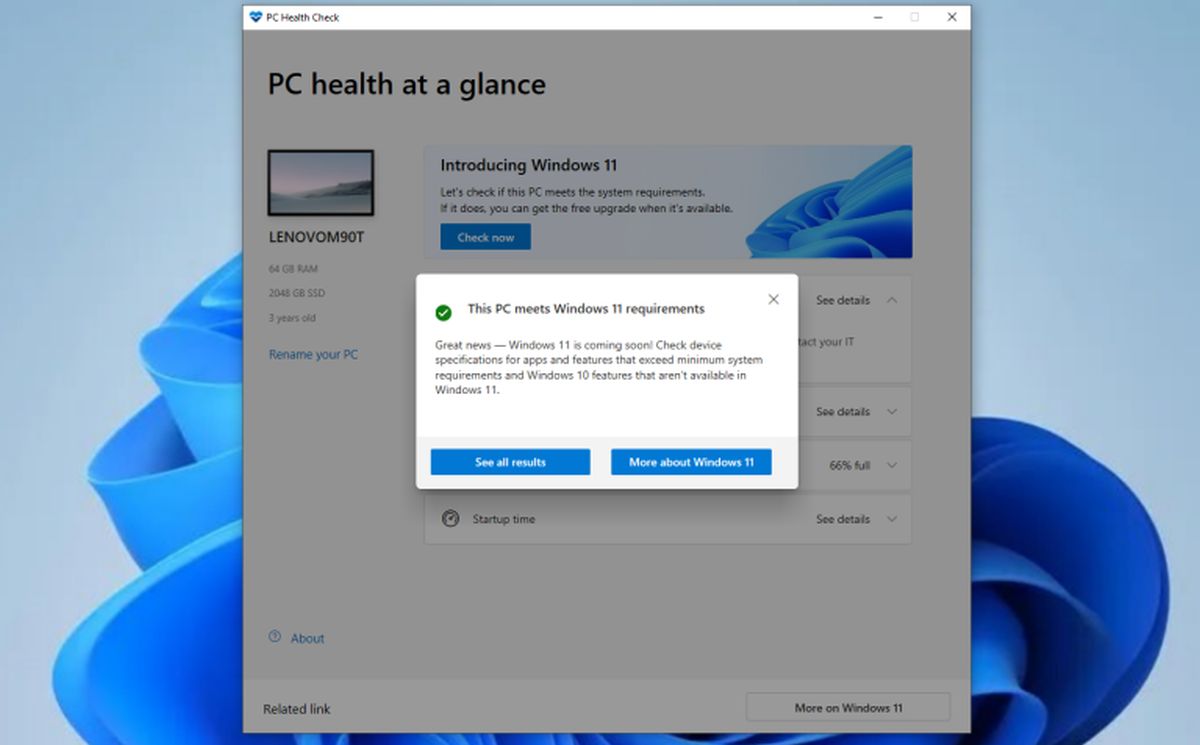
All this, by the way, can be done by using the PC Health Check program, which comes installed by default. If the program gives your system the thumbs up, then the next step is…
Checking For The Update To Windows 11
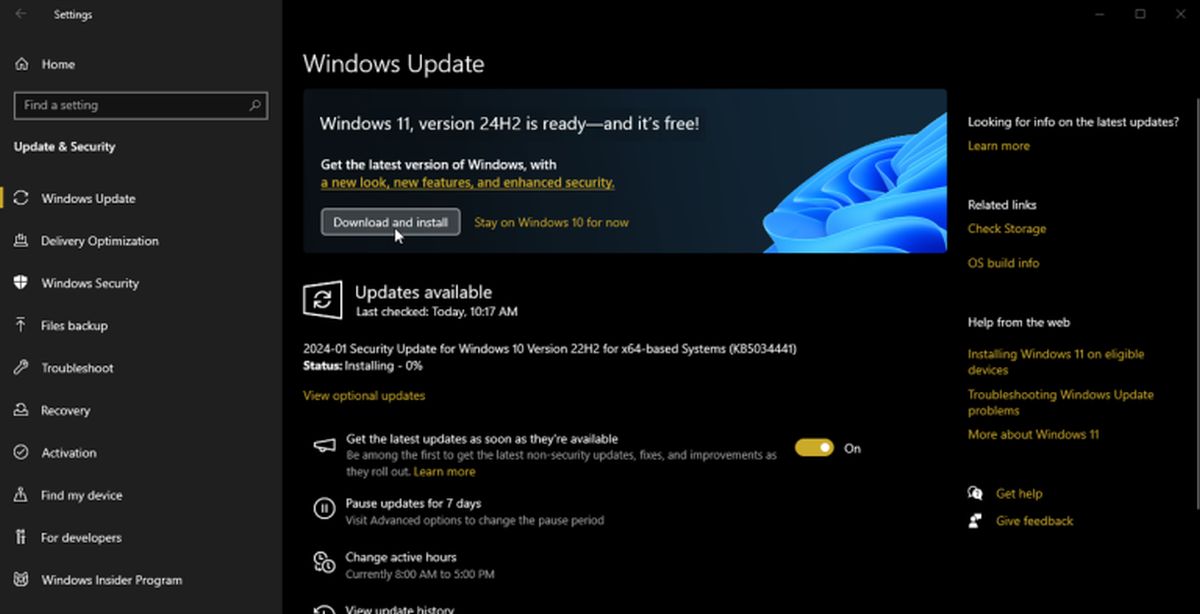
Windows 11 is a free upgrade if you’re coming from Windows 10. All you really need to do is to check your Windows Update on your PC. Simply follow these steps: Settings > Update & Security > Windows Update.
Alternatively, just type “Check for Updates” in the taskbar. Just so much simpler. If you don’t see the option to update to Windows 11, don’t worry. There are other ways to update your system.
Manually Install it Yourself
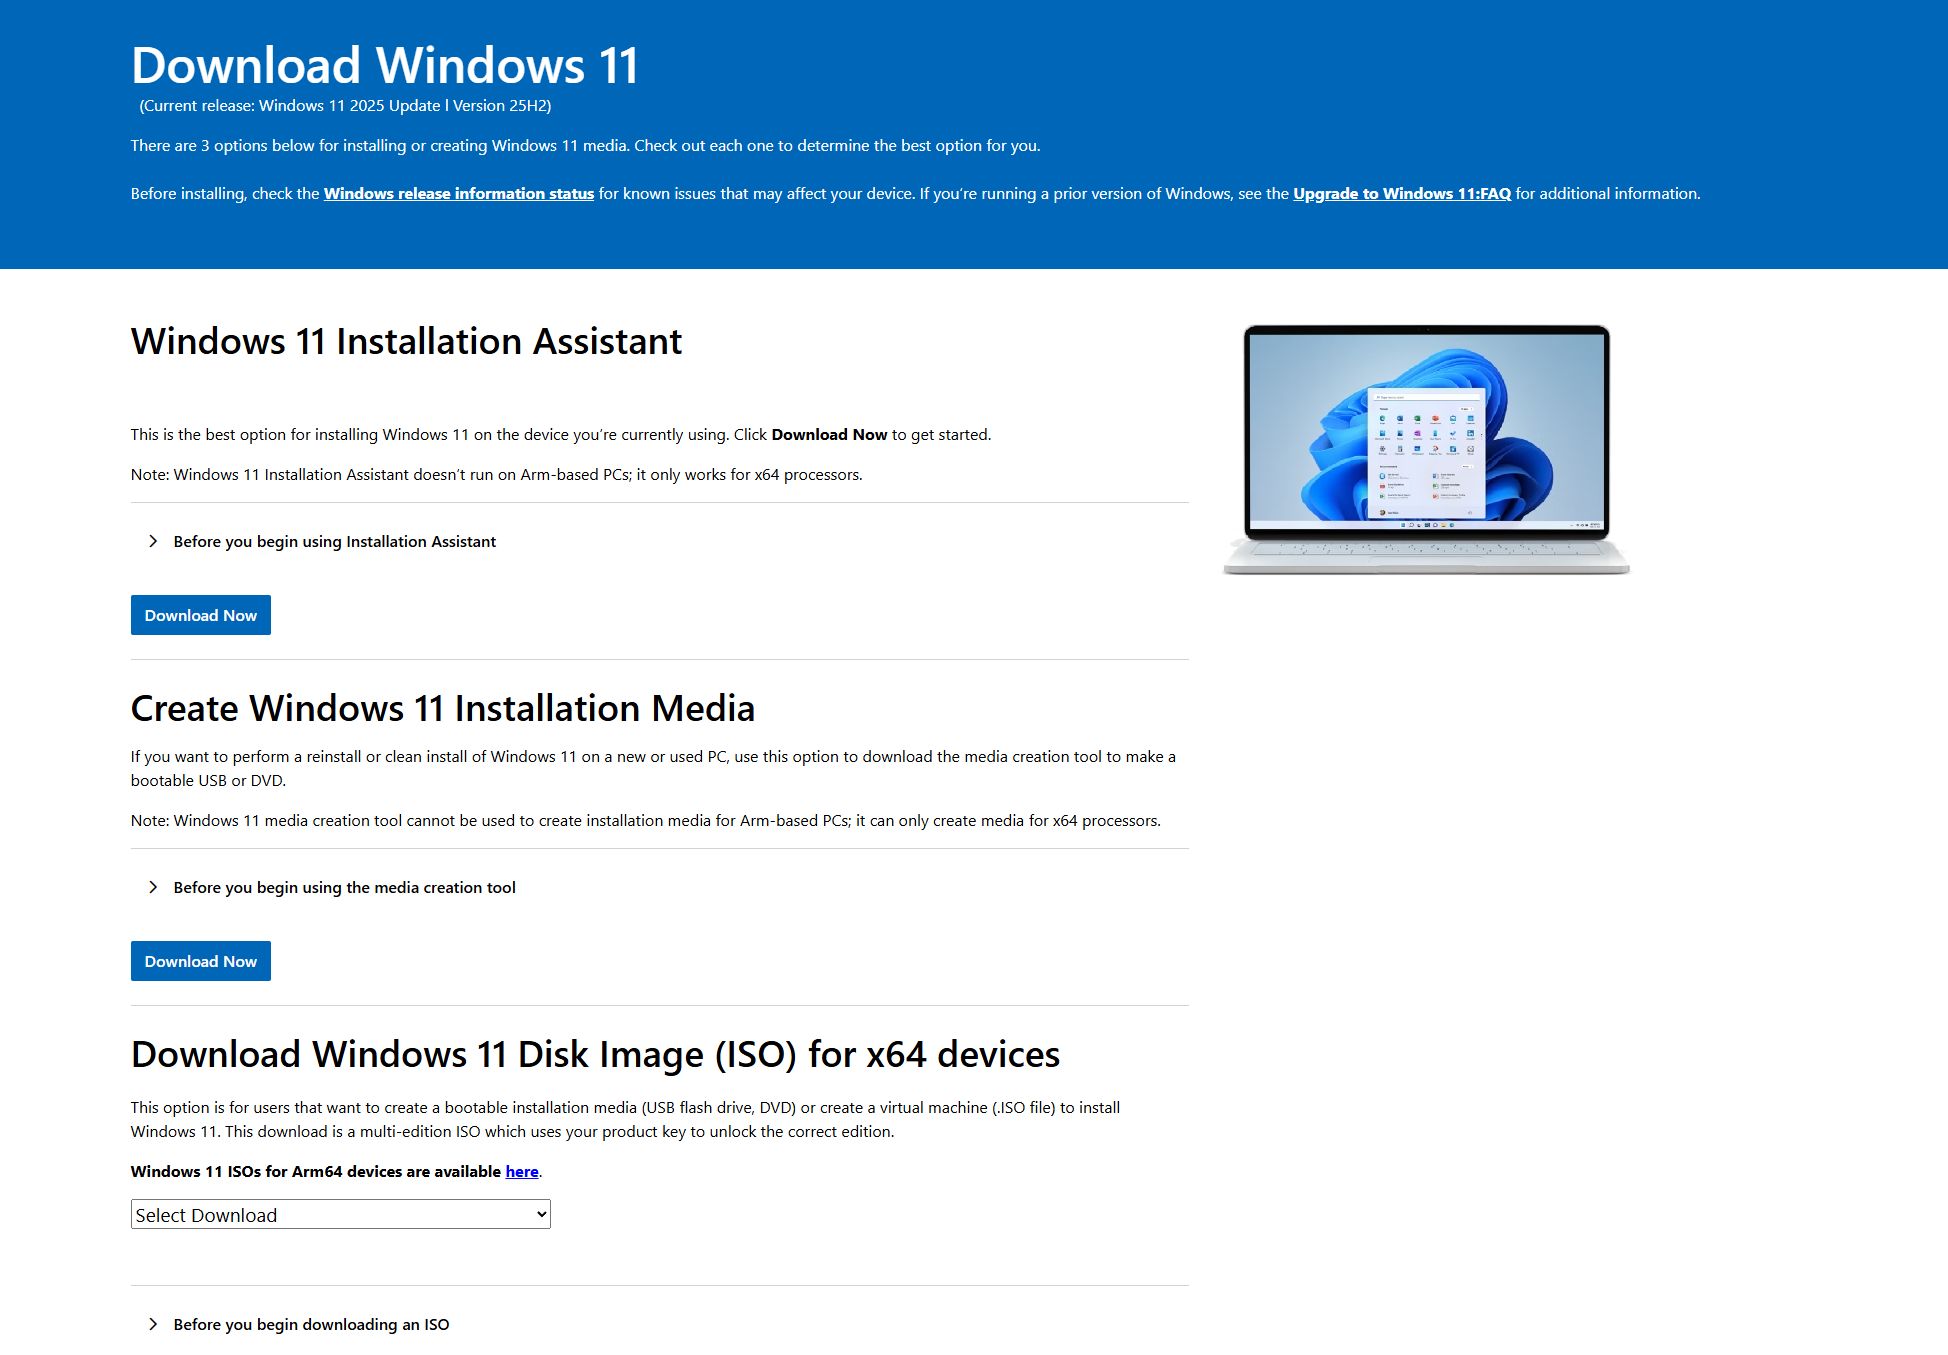
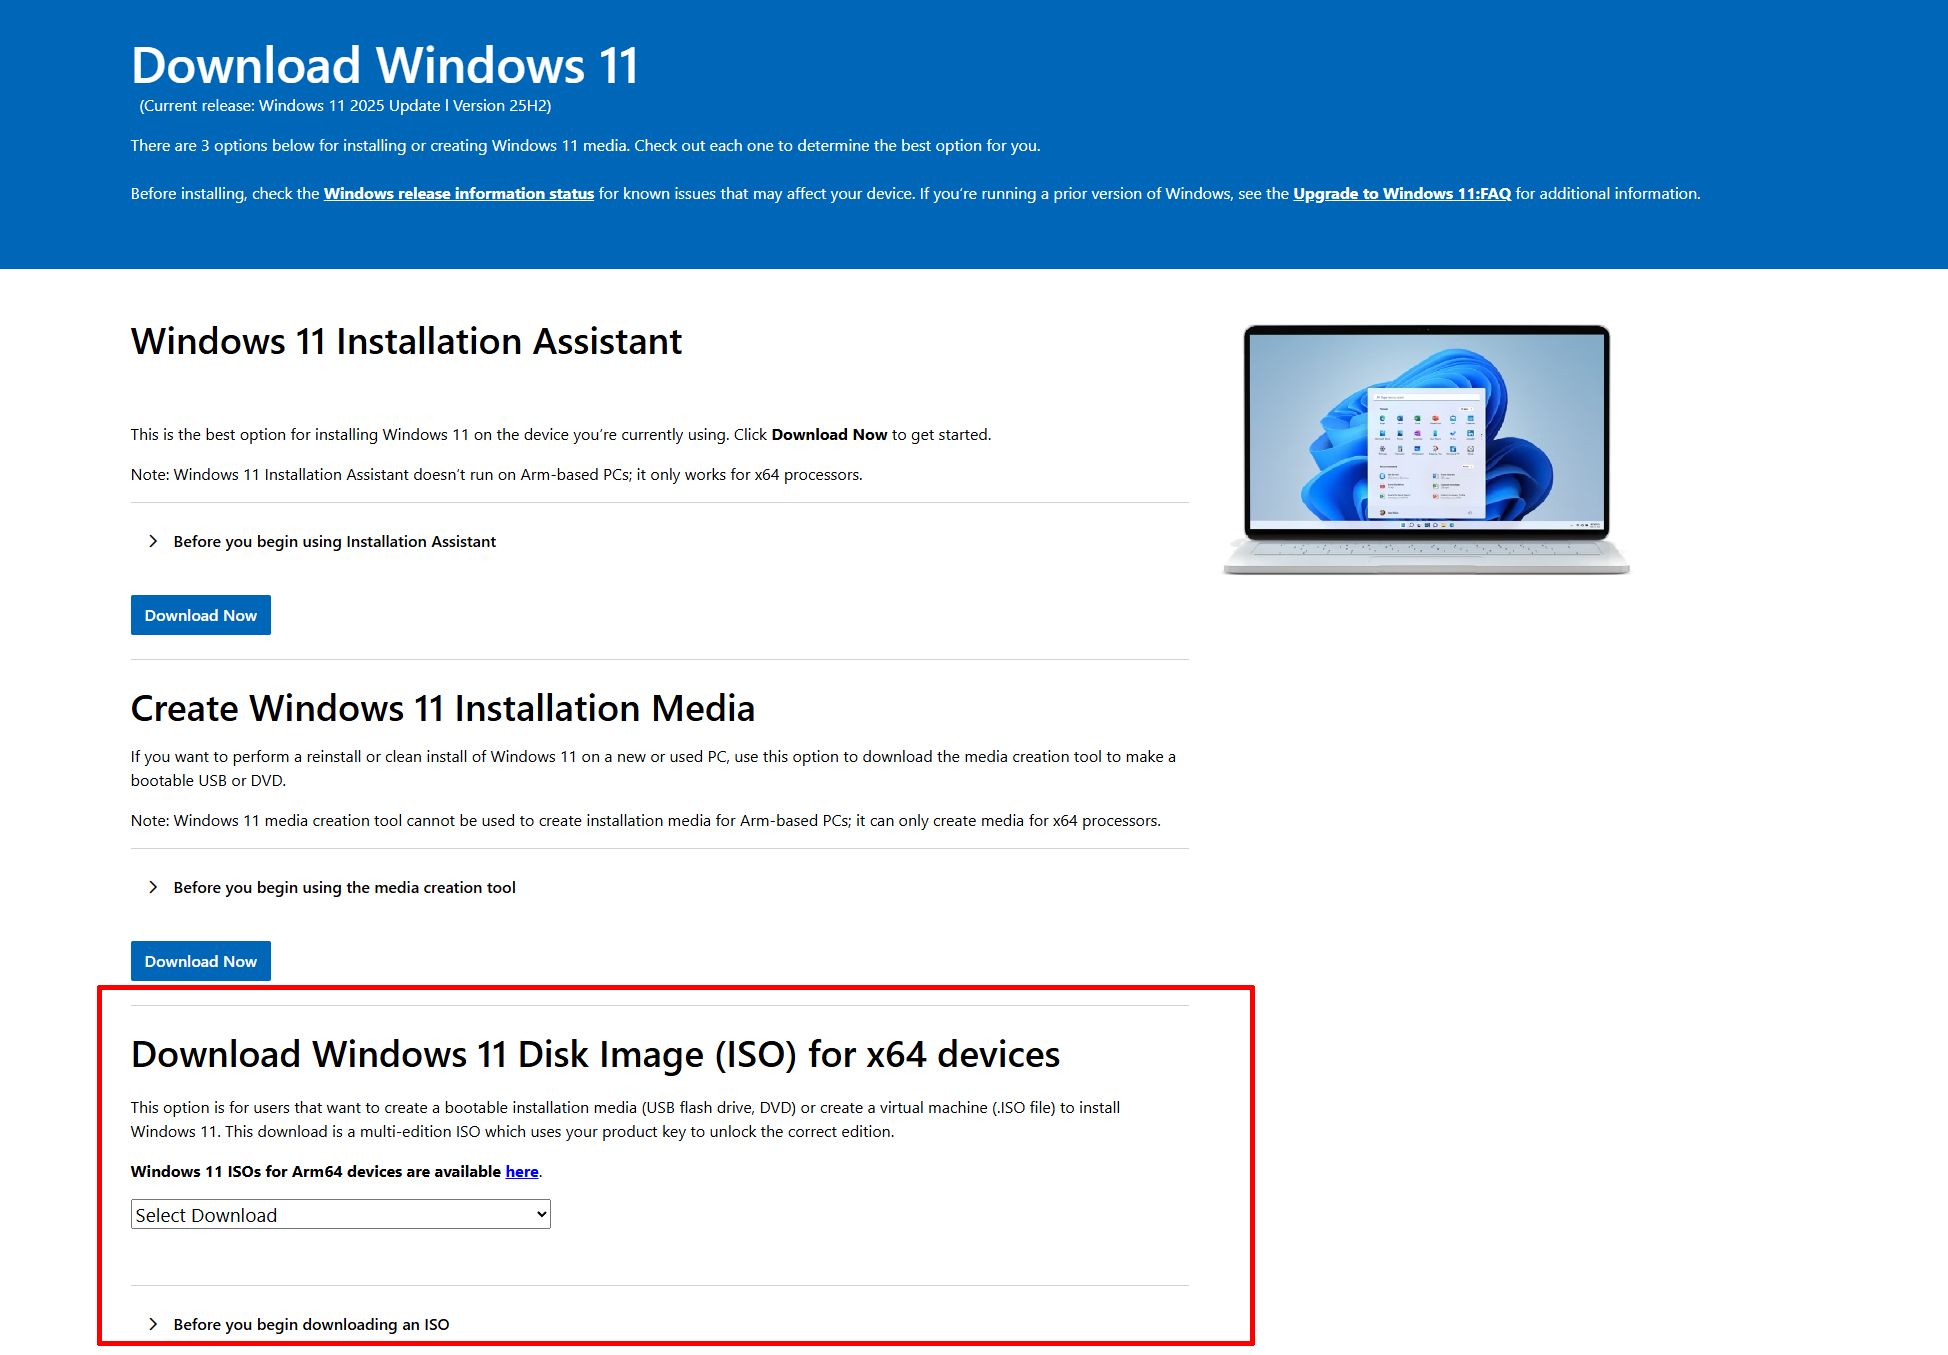
At this point, Microsoft has given you several ways to install and/or update Windows 10 to Windows 11. The first is through the Installation Assistant.
This method requires you to simply head over to the Download Windows 11 page. Hit the Download button, and run the file called “Windows11InstallationAssistant.exe”. Follow the instructions, and you’re good to go.
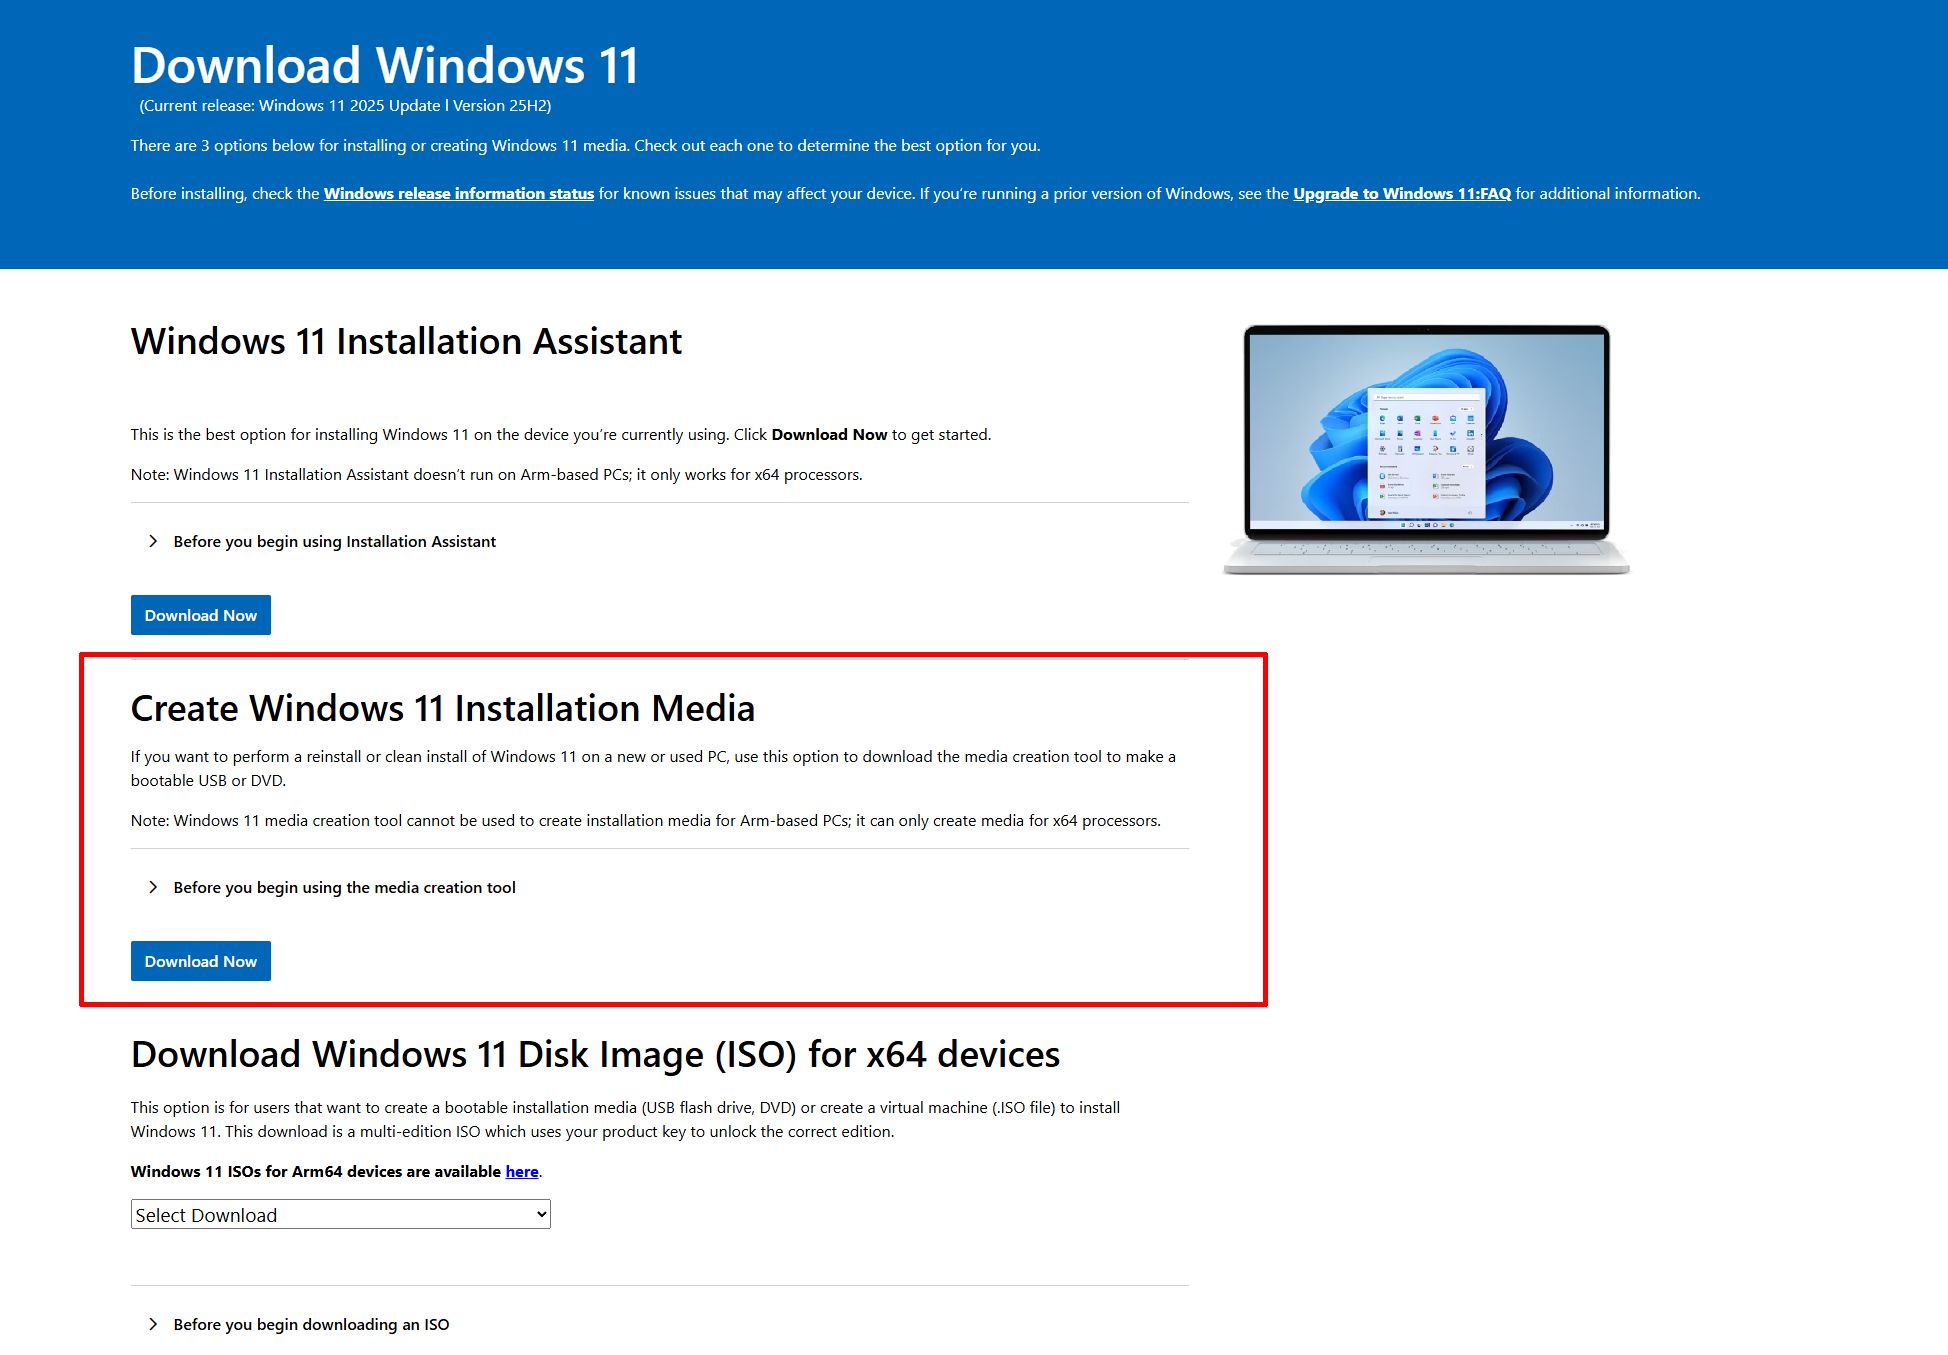
If you’re planning on installing Windows 11 from scratch, then the Media Creation Tool option is the way to go. In the same way you (probably) installed Windows 10, you’ll need to download the ISO file, and have run from a USB thumb drive, or burn it on to a disk.
I don’t know which among you would even consider the latter in this day and age, but just know that if you do, I am judging you very, very hard. Like everything else in life, nostalgia has a limit, the same with self-flagellation and self-harm.
If you’re taking the USB path (which I’m certain you are), make sure it is at least 8GB in size. From there, follow the instructions and in about one hour, guess what? You’ve installed Windows 11 on to your PC.
But what if you’re PC isn’t compatible? What if, despite your resistance, you’ve decided to pull the trigger and want to install it on your non-compatible PC? Believe it or not, there is a way.
Rufus. Totally Rufus
Rufus is a, open source utility app designed for Microsoft Windows, and short for “Reliable USB Formatting Utility, with Source”.
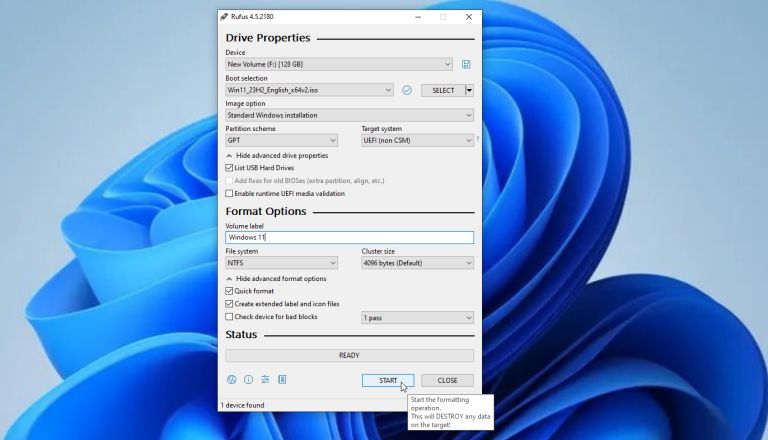
To keep things short and sweet, using Rufus allows you to install Windows 11 on an otherwise incompatible PC. To do this, simply create the Windows 11 ISO (thumb drive, not disk) as explained prior, then install Rufus and launch it.
Insert the ISO drive into any available port, select the Windows 11 ISO file – make sure you choose Standard Windows installation – and make absolutely sure that the device is the USB drive you just stuck into the port.
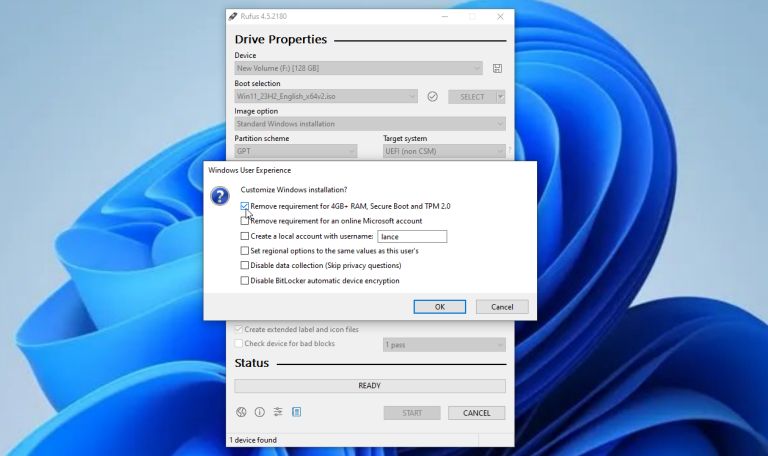
Click start, at the bottom of the Rufus app, and make sure to remove the 4GB+ RAM, Secure Boot, and TPM 2.0 requirement. Click OK, and presto. You’ve set up your Windows 11 boot drive that will install on your non-compatible PC.
And For The Ones Still Resisting…
We’ve actually posted a step-by-step guide on how you can join the Windows 10 Extended Security Updates (ESU). Let us be clear: you can still use Windows 10 but as of 14 October this year, PCs running the OS will not receive the relevant security features needed to keep their systems secure. The ESU is a workaround from the company, but one that comes at a cost of US$30 (~RM141) or 1,000 Microsoft Rewards Points per year. However, there is a free option, but it does come with a catch.
(Additional sources: PCMag)